Summary and Schedule
This is a new lesson built with The Carpentries Workbench.
| Setup Instructions | Download files required for the lesson | |
| Duration: 00h 00m | 1. Running and Quitting JupyterLab on NCI | How can I run Python programs in JuypterLab? |
| Duration: 00h 15m | 2. Introduction to Deep Learning |
What is machine learning and what is it used for? What is deep learning? How do I use a neural network for image classification? |
| Duration: 00h 25m | 3. Introduction to Image Data |
How much data do you need for Deep Learning? How do I prepare image data for use in a convolutional neural network (CNN)? How do I work with image data in python? Where can I find image data to train my model? :::::::::::::::::::::::::::::::::::::::::::::::: |
| Duration: 00h 37m | 4. Build a Convolutional Neural Network |
What is a (artificial) neural network (ANN)? How is a convolutional neural network (CNN) different from an ANN? What are the types of layers used to build a CNN? |
| Duration: 00h 49m | 5. Compile and Train (Fit) a Convolutional Neural Network |
How do you compile a convolutional neural network (CNN)? What is a loss function? What is an optimizer? How do you train (fit) a CNN? How do you evaluate a model during training? What is overfitting? |
| Duration: 01h 01m | 6. Evaluate a Convolutional Neural Network and Make Predictions (Classifications) |
How do you use a model to make a prediction? How do you measure model prediction accuracy? What can you do to improve model performance? What is a hyperparameter? |
| Duration: 01h 13m | 7. Share a Convolutional Neural Network and Next Steps |
How do I share my convolutional neural network (CNN)? Where can I find pre-trained models? Is Keras the best library to use? What is a GPU? What else can I do with a CNN? |
| Duration: 01h 25m | Finish |
The actual schedule may vary slightly depending on the topics and exercises chosen by the instructor.
This lesson is designed for Software Carpentry users who have completed Plotting and Programming in Python and want to jump straight into image classification. We recognize this jump is quite large and have done our best to provide the content and code to perform these types of analyses.
The NCI-QCIF Training Partnership Project version of this lesson uses python virtual environments to run Jupyter Notebooks on NCI’s Gadi supercomputer.
It uses the TensorFlow software library in a CPU only environment.
Please note this lesson is designed to work with CPU only environments. This was an intentional decision to avoid the difficulties in setting up GPU environments. If you are an advanced user and choose to set up a GPU environment, you are on your own. We will not be able to troubleshoot any issues with GPU set up on the day of the workshop.
NCI Account Setup
Sign up for an NCI account if you don’t already have one.
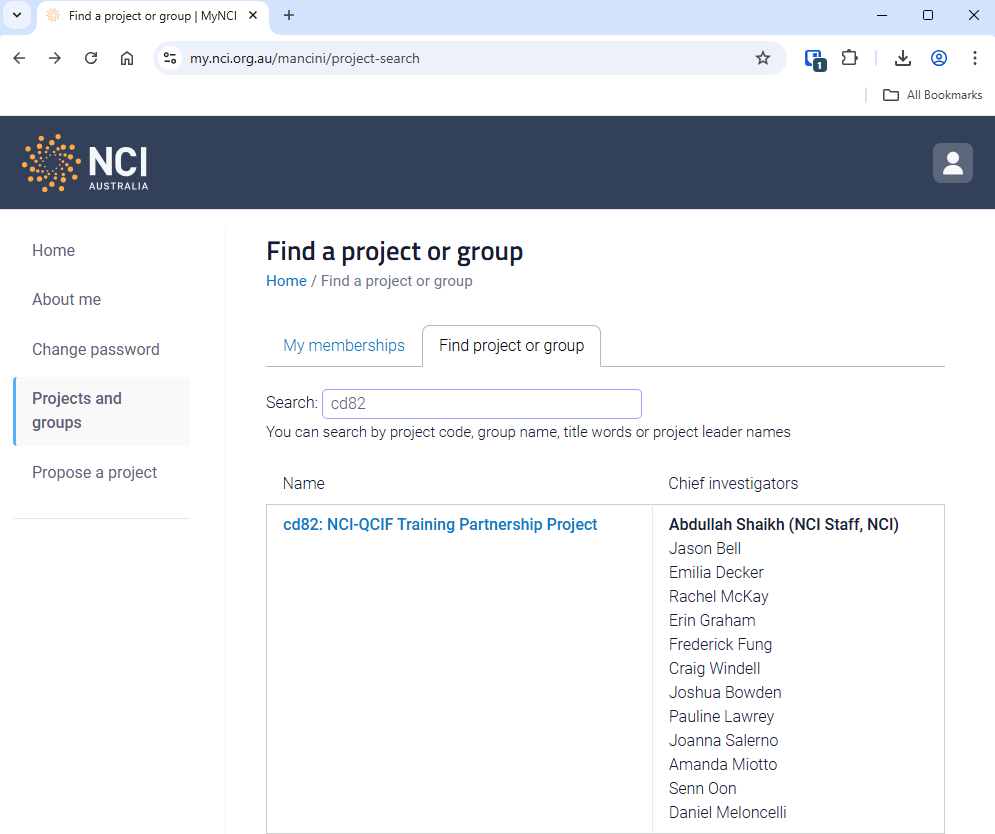
Select Projects and groups from the left hand side menu and then select the Find project or group tab. Search for cd82, the NCI-QCIF Training Partnership Project, and ask to join.
NCI Australian Research Environment (ARE)
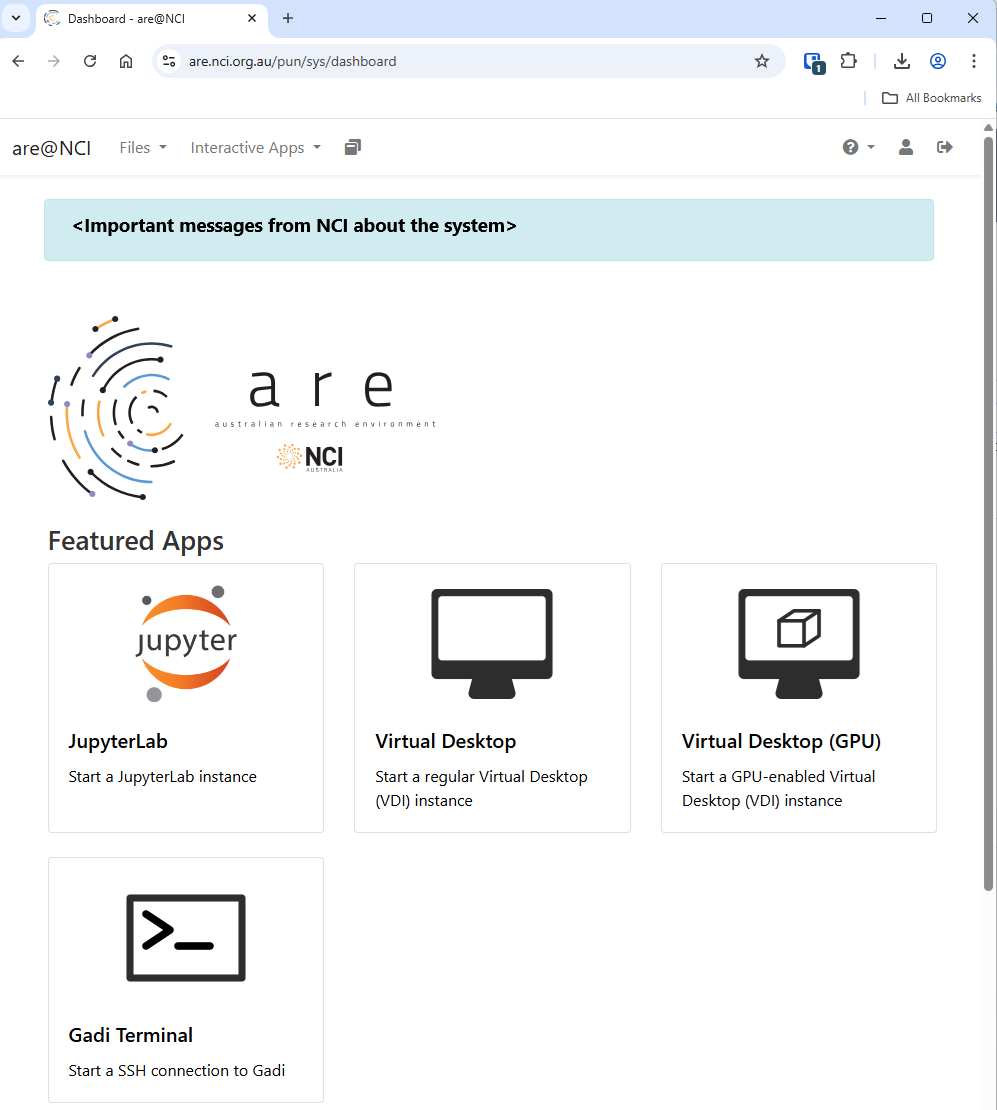
Connect to NCI Australian Research Environment.
Be sure you use your NCI ID (eg, ab1234) for the username and not your email address.
Under Featured Apps, find and click the JupterLab: Start a JupyterLab instance option.
To Launch a JuptyerLab session, set these resource requirements:
| Resource | Value |
|---|---|
| Walltime (hours) | 5 |
| Queue | normal |
| Compute Size | small |
| Project | cd82 |
| Storage | scratch/cd82 |
| Advanced Options… | |
| Modules | python3/3.9.2 |
| Python or Conda virtual environment base | /scratch/cd82/venv_icwcnn_tf213 |
Then click the Launch button.
This will take you to your interactive session page you will see that that your JupyterLab session is Queued while ARE is searching for a compute node that will satisfy your requirements.
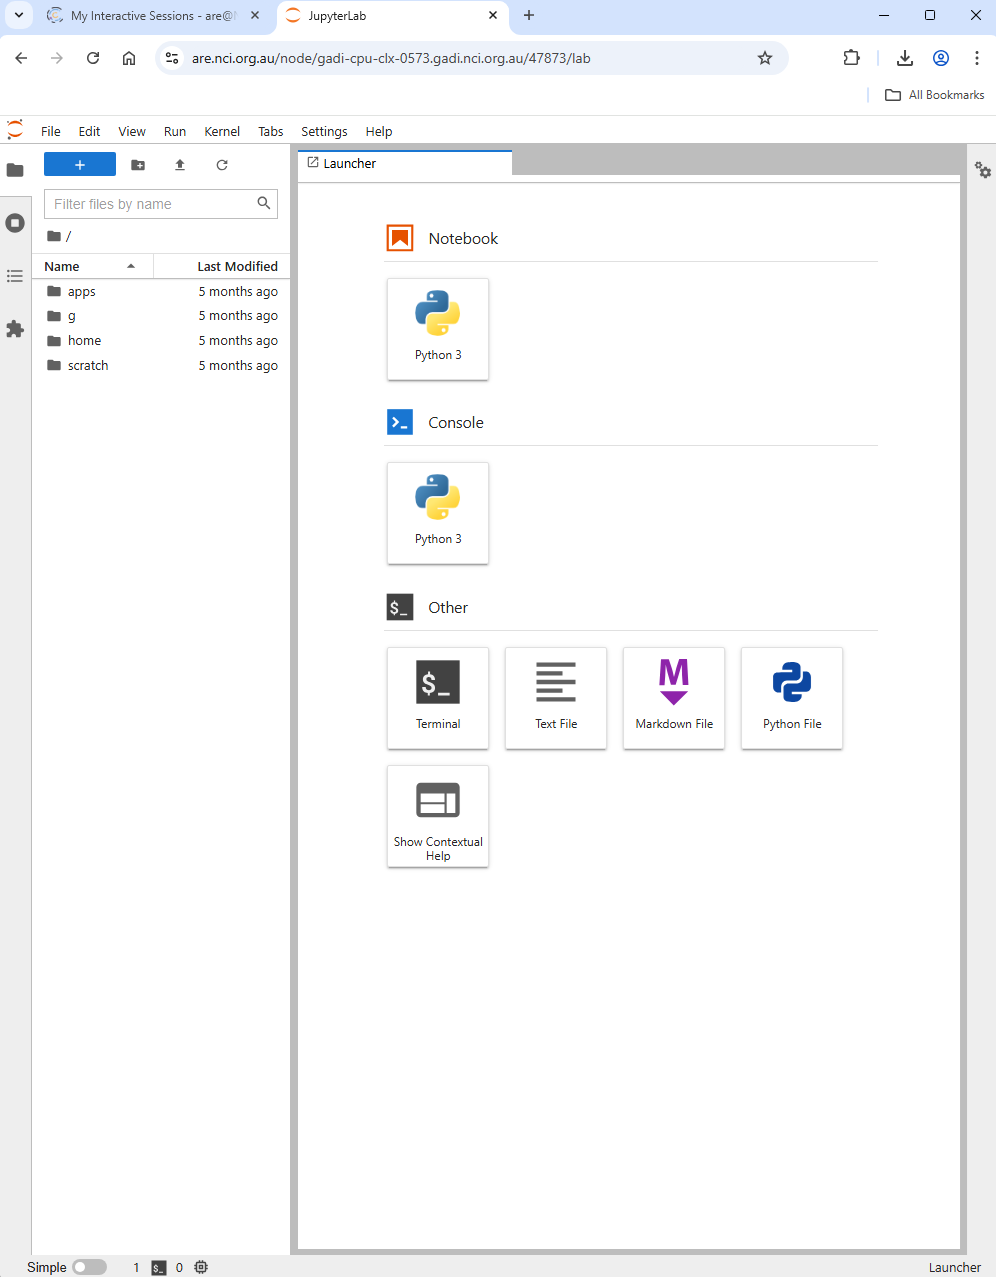
Once found, the page will update with a button that you can click to Open JupyterLab.
Here is a screenshot of a JupyterLab landing page that should be similar to the one that opens in your web browser after starting the JupyterLab server on either macOS or Windows.
Getting the Data
This lesson uses the CIFAR-10 image dataset that comes prepackaged with Keras. There are no additional steps needed to access the data.